Up MGTD15470 » Electrical » Electrical Restoration Prev Next Slideshow

 Previous image  Next image  Index page
Testing the relay box with the alternating flasher
NAPA EL-13 flasher solved problem
EL-13 Flasher close-up
Testing relay with front and rear bulbs
Drilled holes in back of tool box and preped the ground
  Rekay box mounted and TS harness wired.jpg - The relay box mounted and the turn signal harness for the flasher relay, the switch and the warning light or buzzer is installed. The flasher relay was on the other side of the firewall on later cars, just below the fuel pump. Knowing that told me why the wires were so long, and which way to install the box so the wires go in the correct directions. '1' is in the lower left hand corner, upper right hand would be more convenient since it would then match the orientation in the diagram. I will be installing the flasher relay inside the car,  however.  
Turn Signal relay box wired
Working smaller grommet on right hand loom
Easing firewall grommet down the wire branches
Working regulator wires through grommet
Last branch to pass through the grommet

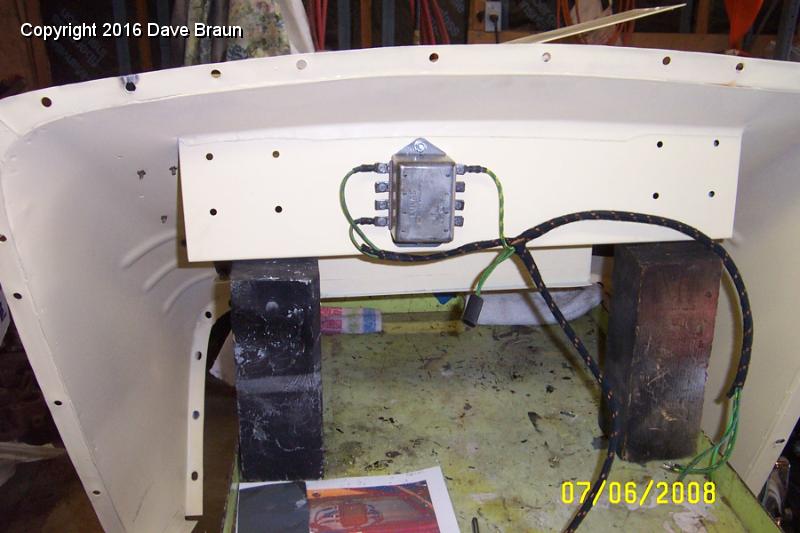
41 | The relay box mounted and the turn signal harness for the flasher relay, the switch and the warning light or buzzer is installed. The flasher relay was on the other side of the firewall on later cars, just below the fuel pump. Knowing that told me why the wires were so long, and which way to install the box so the wires go in the correct directions. '1' is in the lower left hand corner, upper right hand would be more convenient since it would then match the orientation in the diagram. I will be installing the flasher relay inside the car, however. Download
Total images: 67 | Help